Okay, here's my take on documenting the "centurion roman helmet" project, just like a real, down-to-earth kinda blog post:
Alright, so I got this crazy idea stuck in my head – build a centurion helmet. You know, like from the Roman army? I figured, why not? Seemed like a cool project to learn some new stuff and end up with something badass to show off (or hide in the closet, who knows?).
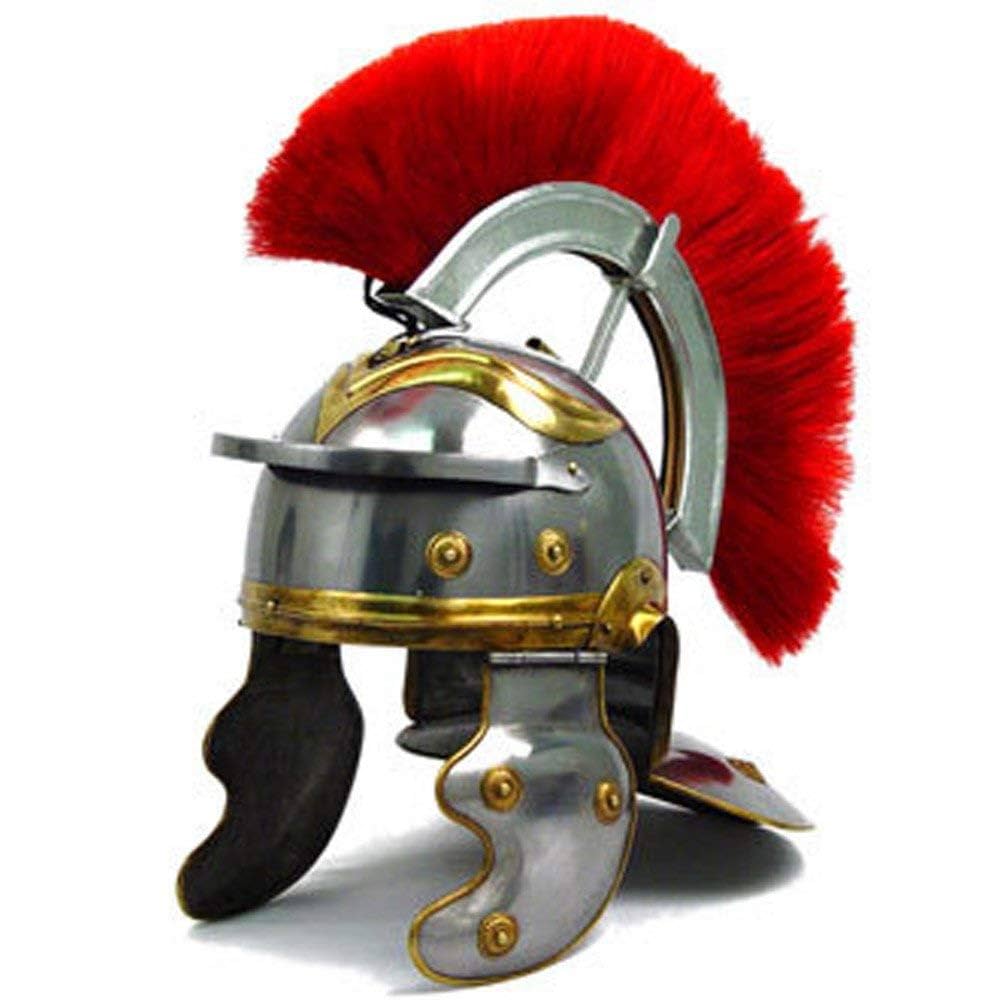
First thing's first: research. I spent a good chunk of time googling "centurion roman helmet," looking at images, trying to figure out the different parts and how they all fit together. Turns out, those things weren't just slapped together; there's some actual design going on. I noticed the crest was a big deal, and that different ranks probably had different helmet styles. I wasn't aiming for perfect historical accuracy, more like "inspired by."
Then came the material choice. Metalworking is beyond my current skill level (maybe a future project!), so I decided to go with something I was more comfortable with: EVA foam. It's cheap, easy to cut, and you can get a decent metallic look with paint. I grabbed a few sheets of different thicknesses from the local craft store.
Next up, templates! I looked online for some basic helmet templates, but nothing was quite right. So, I ended up sketching my own on paper, trying to get the shape and proportions I wanted. This involved a lot of trial and error, cutting out paper shapes, taping them together, and adjusting until it looked vaguely like a helmet. I also watched some videos on how people made similar things using foam. Seeing how others tackled the curves and details was super helpful.
Okay, time to cut! I transferred my paper templates to the EVA foam and started cutting out the pieces with a hobby knife. This part took a while, and my hand definitely got tired. I tried to be as precise as possible, but foam is kinda forgiving, so a little wobble here and there wasn't the end of the world.
The fun part: assembly! I used contact cement to glue the foam pieces together. This stuff is strong, but you gotta be careful because it bonds instantly. No room for mistakes! I started with the main helmet bowl and then added the cheek plates and neck guard. Clamps and clothespins became my best friends during this stage, holding everything in place while the glue dried.
Now for the details. I added some decorative strips of thinner foam around the edges and on the cheek plates. I also decided to add some "rivets" using small dome-shaped studs I found online. These were just glued on for looks, but they added a nice touch of realism.
The crest was a challenge. I wanted something that looked impressive but wasn't too heavy. I ended up using a combination of foam and a plastic rod for support. I covered the foam with some red fabric to give it that classic centurion look. Attaching the crest to the helmet was tricky; I used a combination of glue and screws to make sure it was secure.
Time for paint! I used a metallic silver spray paint to give the helmet a metal look. I applied several light coats, letting each coat dry before applying the next. Then, I used some black acrylic paint to add some weathering and shading, making the helmet look like it had seen some battles. I tried to dry brush the black paint so it settled into the crevices and edges.
Finally, I added some padding inside the helmet for comfort. I used some scrap fabric and foam to create a simple liner that would keep the helmet from rubbing against my head.
And that's it! My centurion helmet was complete. It's not perfect, but I'm pretty happy with how it turned out. It was a fun project that taught me a lot about working with foam and creating props. Would I do it again? Probably! Maybe a different style next time, or perhaps with some actual metalworking involved. Who knows? The Roman Empire awaits!
- Learned: Foam crafting, prop making basics.
- Challenges: Crest construction, paint weathering.
- Next time: Try metal details, refine templates.


