Alright, so today I'm gonna walk you through how I tackled this gladiator helmet project. It was a fun one, definitely had its challenges, but hey, that's what makes it interesting, right?
First off, Inspiration and Planning: I spent a good chunk of time just scouring the internet for reference images. I wanted to get a real feel for the different styles of gladiator helmets. Some are super ornate, some are more practical looking. I ended up going for something in between – a bit of flair, but still looked like it could take a beating. I sketched out a rough design, nothing fancy, just to get the proportions right. This is crucial; otherwise, you'll end up with something that looks like a weird hat instead of a helmet.
Next Up: Basic Shape and Blocking: I started with a simple sphere. Yeah, boring, I know, but you gotta start somewhere. I used my 3D software's sculpting tools to pull and push the sphere into the basic helmet shape. Think of it like digital clay. This stage is all about getting the overall form correct. Don't worry about details yet. Focus on the silhouette. I kept checking my reference images to make sure I was on the right track.
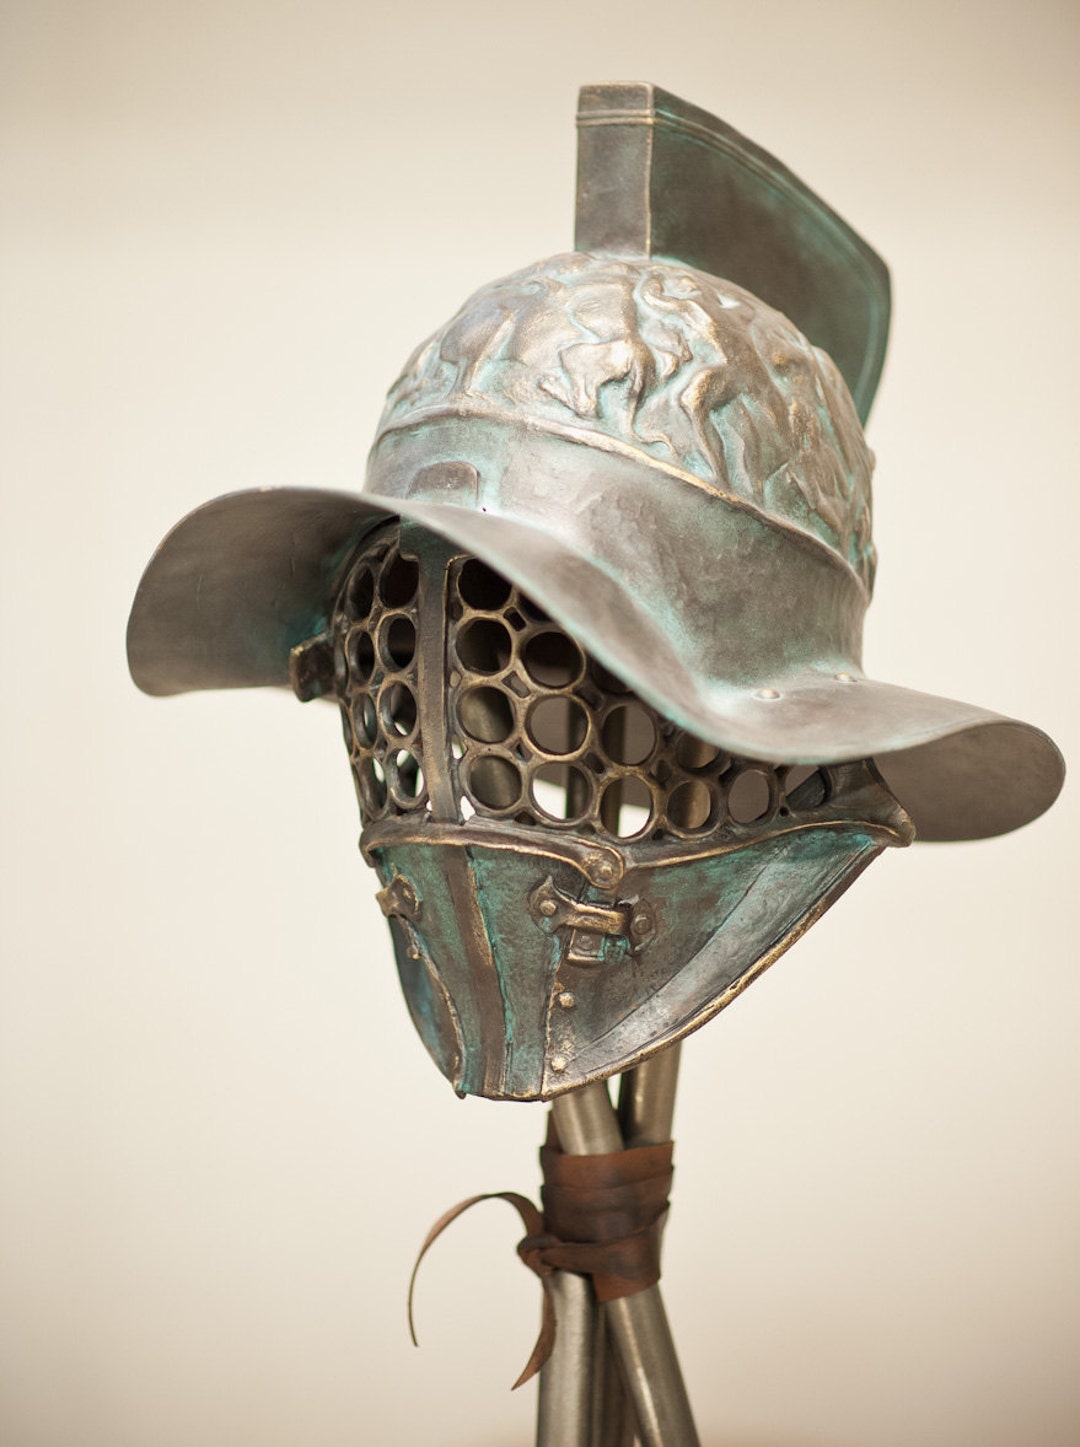
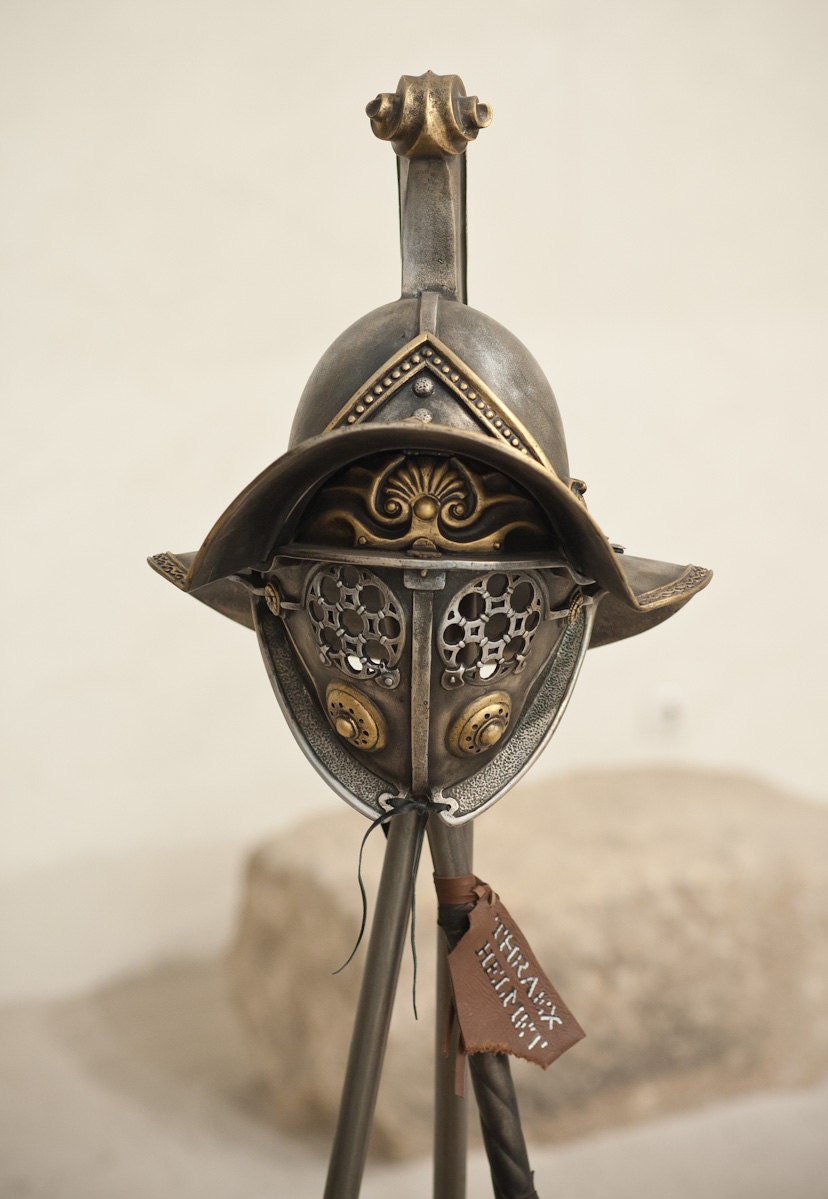
Adding Details: This is where things got interesting. I started adding the key features – the cheek guards, the visor, the crest attachment point. I used a combination of sculpting and hard surface modeling techniques. The cheek guards were relatively straightforward; it was just about getting the curves right. The visor was a bit trickier; I wanted it to look like it could actually provide some protection. I added some thickness to it and made sure it flowed nicely with the rest of the helmet.
Crest and Ornamentation: The crest was the fun part! I decided to go for a stylized horsehair crest. I used a particle system to create the individual strands and then sculpted them into shape. It took a few tries to get it looking right, but I was happy with the result. I also added some basic ornamentation to the helmet – some etched lines and a few decorative studs. Nothing too over the top, just enough to give it some character.
Texturing and Materials: This is where it all comes together. I wanted the helmet to look like it had seen some action. I used a combination of hand-painted textures and procedural textures to create a worn and weathered look. I paid close attention to the material definition – the metal needed to look like metal, and the horsehair needed to look like horsehair. I added some scratches, dents, and dirt to further enhance the realism.
Lighting and Rendering: Finally, it was time to bring the helmet to life with lighting. I used a three-point lighting setup to highlight the details and create some nice shadows. I experimented with different lighting angles and intensities to find the look I was going for. Once I was happy with the lighting, I hit render and waited. And waited. And waited... but it was worth it!
Lessons Learned: This project taught me a lot about sculpting, texturing, and lighting. It also reinforced the importance of planning and reference gathering. Without good references, you're just shooting in the dark. And don't be afraid to experiment! That's how you learn and grow as an artist.
I'm pretty stoked with how the gladiator helmet turned out. It's not perfect, but it's a solid piece of work that I'm proud of. And hey, maybe I'll tackle another helmet project in the future. Who knows? Maybe a samurai helmet next time!


