Alright, so I’ve been wanting to make an ancient Greek Athenian helmet for ages. You see them in movies and museums, and they just look so iconic, right? I figured, why not give it a shot myself? It’s not like I’m a professional props maker or anything, just someone who likes to get their hands dirty and build stuff. So, I decided to document how I went about it, the good, the bad, and the slightly lopsided.
Getting Started: The Big Idea and Some Homework
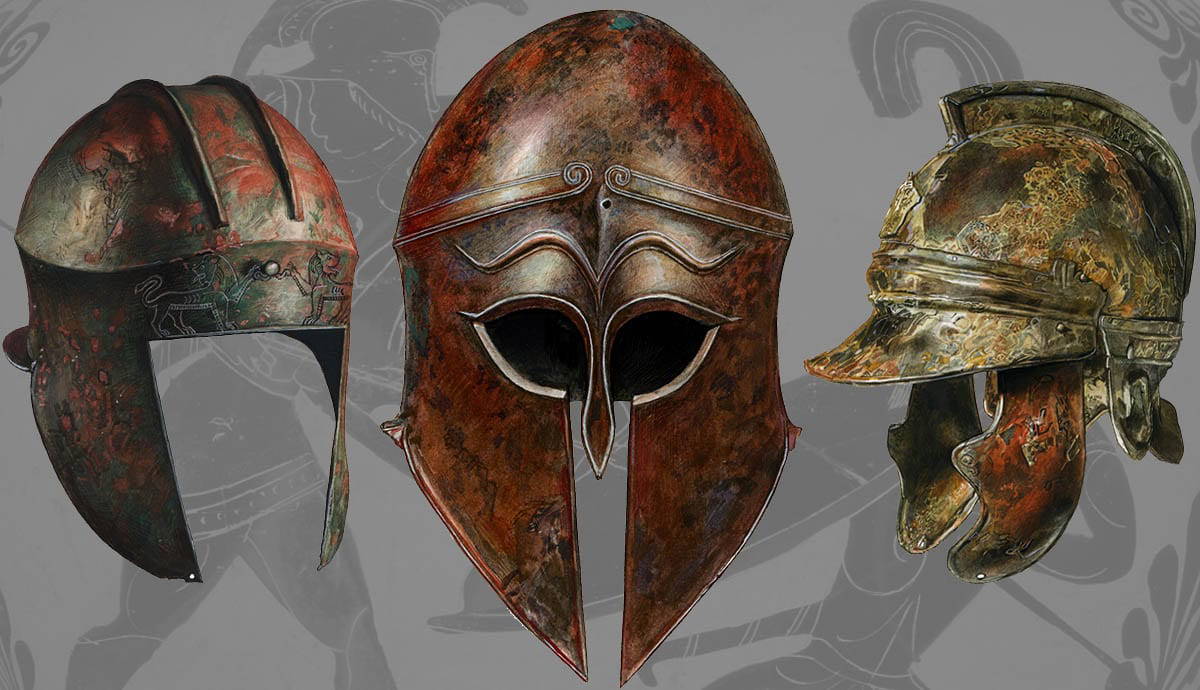
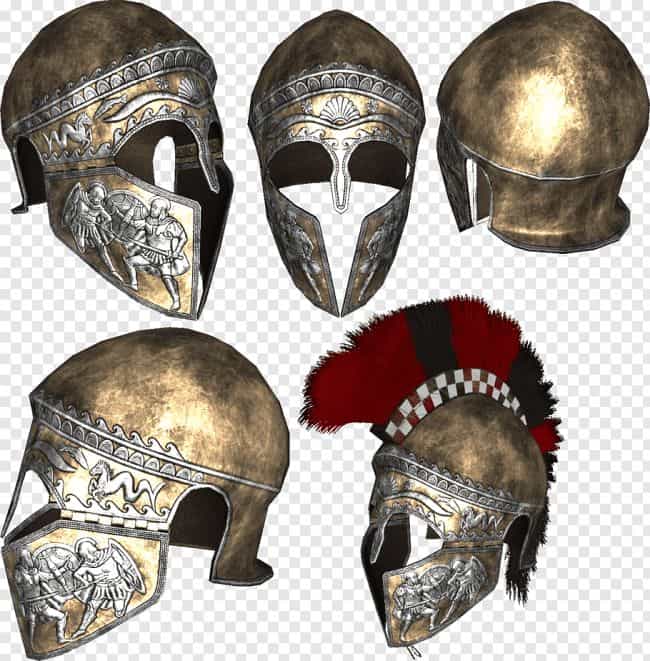
First off, I had to figure out what I was even aiming for. "Athenian helmet" sounds specific, but there's a bit of variation. I spent a good few evenings just scrolling through images online, looking at historical examples and replicas. I wasn't going for 100% historical accuracy down to the last rivet, but I wanted something that felt right, you know? I settled on a fairly classic design, the kind with those cool cheek pieces and a spot for a crest.
Then came the material choice. I thought about metal, but let’s be real, I don’t have a forge in my backyard. 3D printing was an option, but I wanted something more hands-on. So, I landed on EVA foam. It’s pretty popular for this kind of thing, relatively cheap, and you can shape it with a bit of heat. I’d messed around with it before on smaller projects, so it felt like the way to go.
Stocking Up: The Tools and Materials
Once I had a plan, it was time to gather my supplies. This part always feels like a mini-adventure. Here’s what I ended up using:
- EVA foam: I got some thicker sheets, like 10mm, for the main structure, and some thinner 5mm stuff for details and layering.
- Contact cement: The smelly kind. This stuff is serious business for sticking foam together.
- A sharp utility knife and plenty of blades: Seriously, don't skimp on sharp blades. A dull blade will just tear the foam and make your life miserable.
- A heat gun: Essential for shaping the foam.
- A rotary tool (like a Dremel): Super handy for smoothing edges and carving details.
- Measuring tape and a ruler: Obvious, but crucial.
- Markers: For drawing patterns on the foam.
- Sealer: I used a few coats of a flexible primer. Some people use Plasti Dip.
- Paints: Mostly acrylics. Bronze, black, a bit of silver, and some browns for weathering.
- Patience: Lots and lots of it. This wasn't on the shopping list, but trust me, you'll need it.
The Actual Making Of It: Step-by-Step (Sort Of)
Okay, so the first real step was making a pattern. I thought I could just wing this based on my head size. Bad idea. My first attempt looked like a lumpy bucket. I eventually found some basic helmet templates online and adapted them. Drew it out on paper, cut it, and tested it. Lots of trial and error here.
Once I was happy-ish with the paper pattern, I transferred it to the EVA foam. Then came the cutting. Slow and steady wins the race here. I tried to make long, clean cuts. It’s harder than it looks, especially on curves.
Next up: shaping. This is where the heat gun comes in. I’d heat a piece of foam until it was pliable, then bend it over a curved surface to get the right shape. I used a big paint can, a volleyball, even my own knee for some parts. You gotta be careful not to overheat it, or it gets weird and bubbly.
Assembling the main dome was probably the trickiest part. Getting those curved pieces to meet up nicely without big gaps took a lot of fiddling. Contact cement is no joke – you apply it to both surfaces, let it get tacky, then press them together. And once they touch, they are stuck. No second chances, really. I definitely had a few moments where I wished I had an undo button.

After the main dome was done, I worked on the cheek pieces and the little visor-like front. More cutting, shaping, and gluing. I also added some raised details using thinner foam strips to give it a bit more definition.
For the crest, I built a base shape out of foam. I didn't want to use real horsehair, so I found some coarse black bristles from a big brush, bundled them up tight, and glued them into a channel I cut into the foam crest base. It’s not perfect, but it gives the right impression from a distance.
Making It Look Old: Sealing and Painting
With the construction done, it was time to seal it. Foam soaks up paint like a sponge, so you need to seal it first. I used a couple of coats of a flexible primer, letting each coat dry properly. This also helps to hide some of the foam texture and smooth out minor imperfections.
Then, the fun part: painting! I started with a black base coat over the whole thing. Once that was dry, I used a metallic bronze paint. I didn’t just spray it on flat; I did a lot of dry brushing to let some of the black show through, especially in the crevices. This gives it that old, worn metal look. I added some darker washes with black and brown paint diluted with water, dabbing it into recesses and wiping off the excess to simulate grime and age. A little bit of silver dry-brushed on the edges gave it a look of wear and tear.
What I'd Do Differently (And What Went Wrong)
Looking back, I definitely underestimated how much time the patterning and cutting would take. If I make another one, I’ll spend even more time on getting the patterns perfect before I even touch the foam. Also, ventilation is key when working with contact cement. My workshop smelled pretty strong for a couple of days.
Getting perfectly smooth curves with EVA foam is a real challenge. My helmet has a few slightly uneven spots, but I’m telling myself it adds to the "battle-worn" character. Yeah, let’s go with that.
The End Result
So, after a fair bit of effort, some frustration, and a lot of glue fumes, I've got my very own Athenian helmet. It’s not something you’d see in a museum exhibit, but it’s solid, it looks pretty cool sitting on my shelf, and most importantly, I made it. It was a really satisfying project, and I learned a ton. Now I just need to figure out what to build next!


